Before: following paint marks on trees with no idea where they lead. After: seeing the waymarked hiking trails on the map and laying your route along them before you set off. MapPlanner makes that shift possible: switch the option on and marked routes stand out, other paths fade into the background and automatic route drawing sticks to the waymarks between your points. It is free, with or without an account.
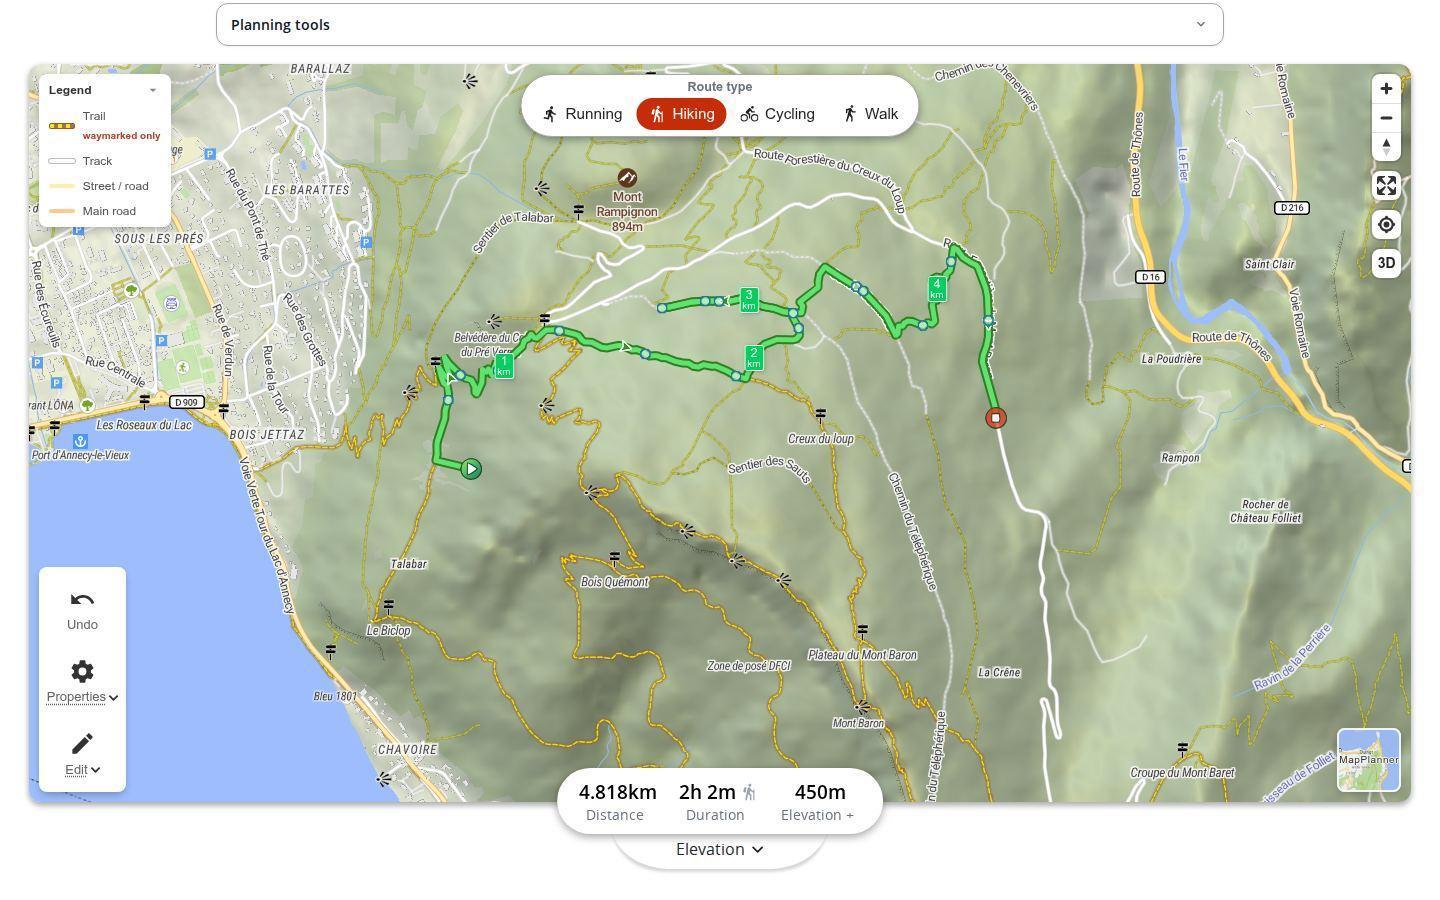
Showing waymarked trails in the planner
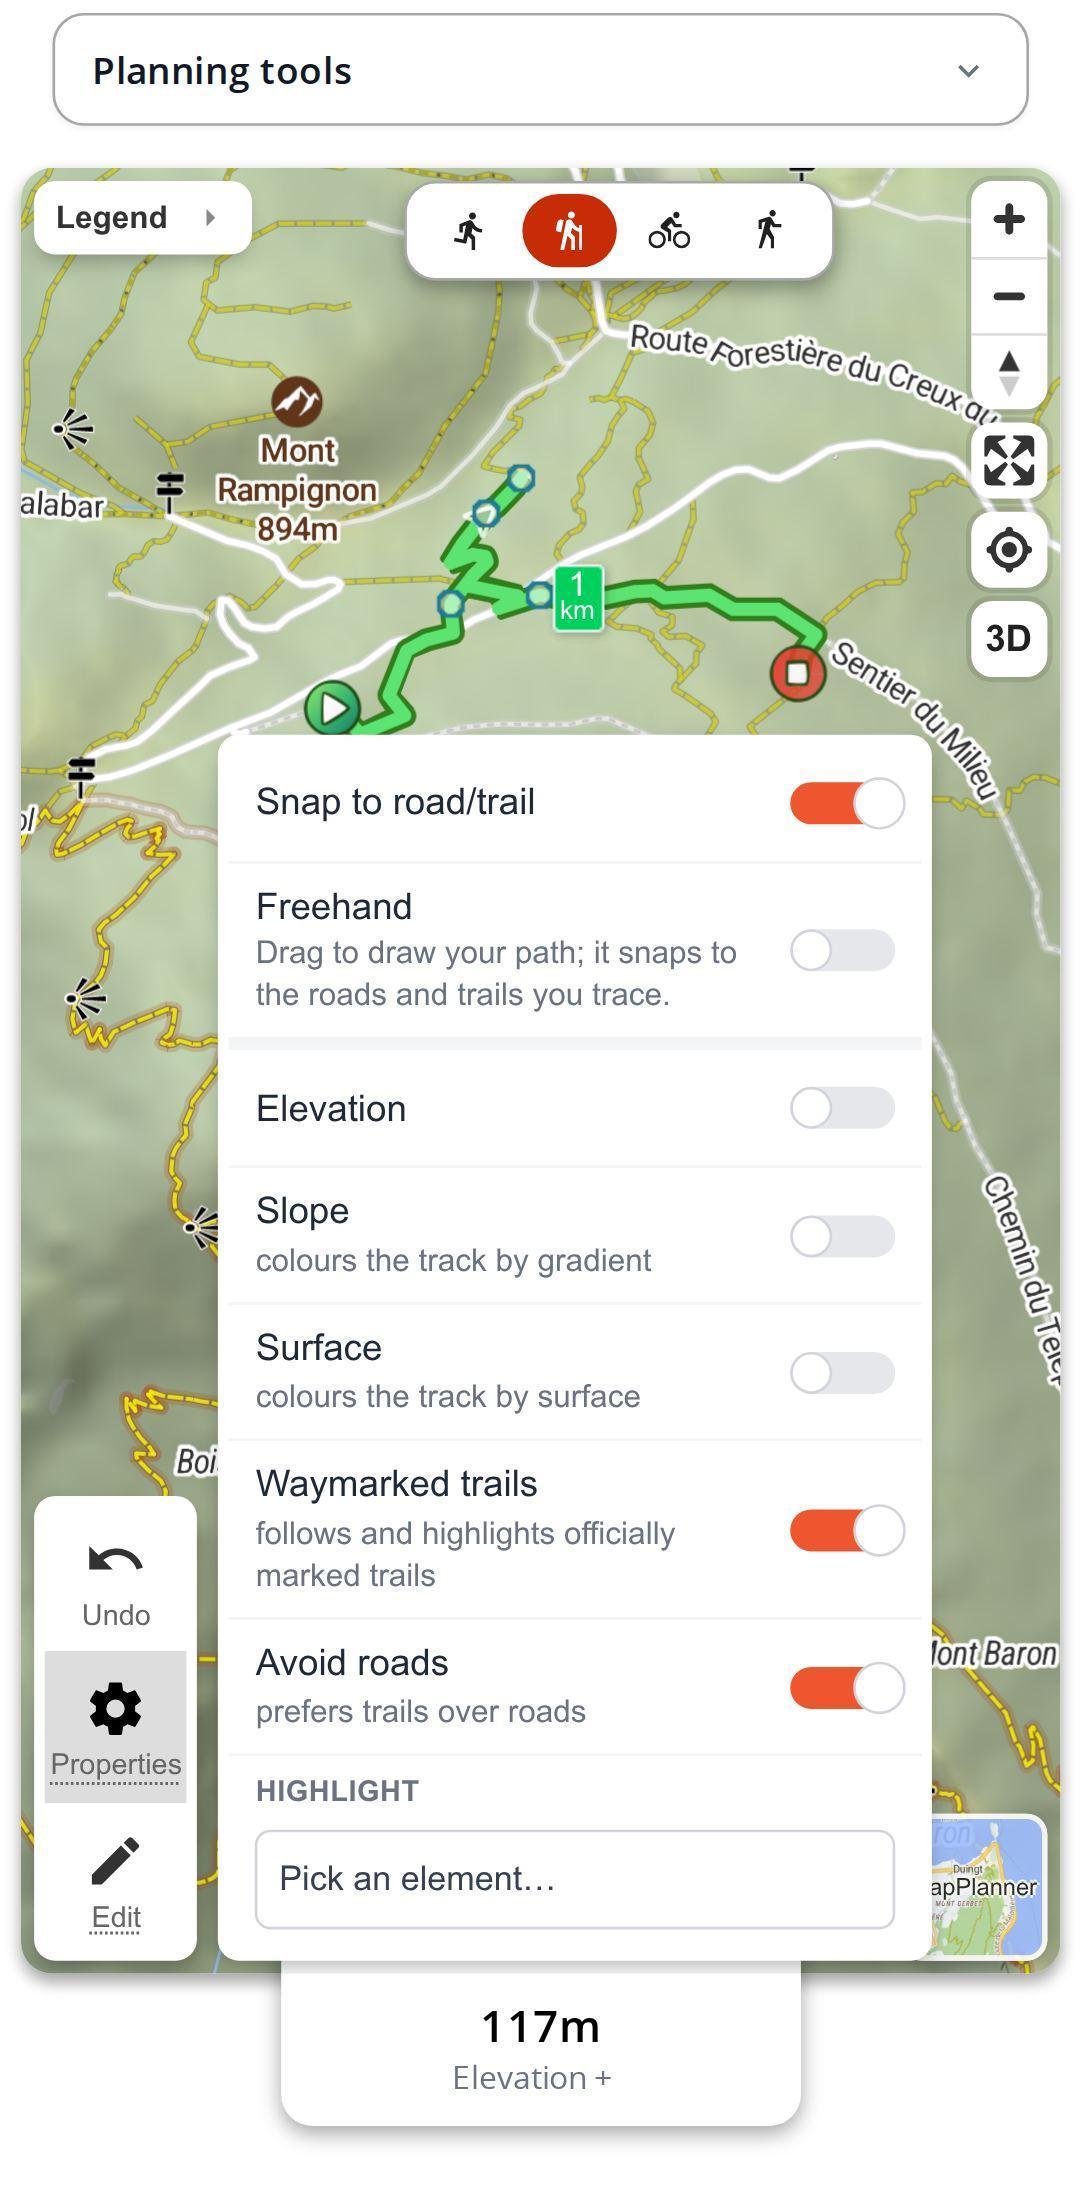
Everything happens in the hiking planner. Pick hiking as your activity and stay on the MapPlanner or Outdoor base map, since those carry the waymarking data. Then open the map properties and switch on Waymarked trails.
Now zoom in on your area. Up close, waymarked trails get a colored border while the rest of the network fades. At a glance you can tell where the maintained routes run, where they meet and which ones reach the summit or village you have in mind. Click on the map to drop your points: the route calculation follows the waymarks from one point to the next.
Plan your own route
MapPlanner helps you calculate distances, elevation, duration and plan your hikes, runs and bike rides on an interactive map.
- Automatic distance & elevation calculation
- Topographic, satellite maps
- GPX/KML export for your GPS
- Real-time GPS tracking
Where the waymarked routes come from
The highlighted trails are the waymarked hiking routes recorded in OpenStreetMap, whatever their network: international, national, regional or local. A long-distance path shows up just like the little loop signposted by the local village.
Avoid roads and stay on footpaths
In the same properties, the Avoid roads option changes how routes are calculated, not how the map looks: whenever a path and a paved road both connect two points, the route prefers the path. It is available for hiking, walking and running. For hiking it is already on; for walking and running you switch it on yourself. Changing activity resets it to that activity's default.
Combine it with waymarked trails and you get a route that follows the waymarks with as few paved sections as possible. The reachable area takes both settings into account too, so it matches your route.
Tips for a waymarked hike without surprises
- Can't find the option? Check the activity and the base map: waymarked trails are only offered for hiking, on the MapPlanner and Outdoor base maps. Switching activity or base map turns the option off.
- Watch the legend. If part of the route runs along a main road, one point placed on the nearby trail is often enough to pull it back onto the waymarks.
- Use few points, in the right places: junctions, summits, huts, parking areas. The calculation fills in the rest along the trails.
- With children, a fully waymarked route is easy to follow at every junction and spotting the next mark becomes part of the game.
- On vacation, turn the option on before drawing anything: the hiking network around where you are staying appears and loop ideas come with it.
- On the ground, trust the marks and signposts first: they remain the reference.
Free waymarked trails, account or not
Both options are free and work without creating an account. The free MapPlanner base map is all you need to see the waymarks. The Outdoor base map is one of the map styles included in the Explorer plan.
Your next weekend hike takes a few minutes to prepare: open the hiking planner, switch on waymarked trails and let the route follow the marks.
Waymarked trails: your questions
Is showing waymarked trails free?
Yes. Waymarked trails and the avoid roads option are free and available without an account, on the MapPlanner base map.
Why can't I see the waymarked trails option?
It is only offered with the hiking activity and on the MapPlanner and Outdoor base maps. On another base map or with another activity, it is hidden.
Which waymarked trails are shown?
The waymarked hiking routes recorded in OpenStreetMap, from international, national, regional and local networks. Always check the waymarks on the ground.
Can I see waymarked trails on my phone?
Yes. The planner runs in your phone's browser: switch the option on in the map properties, just as on a computer.


