It is the night before a big day out. The pack is ready and the route is saved. One last thing: fly over it in 3D and see every climb in full relief before you set foot on it. From the route page, the MapPlanner 3D fly-over tilts the camera and sweeps along your route from start to finish. Ridges, passes and valley floors roll by beneath you, so tomorrow morning the terrain already feels familiar.
Fly over your route in 3D, from start to finish
The fly-over starts from the page of a saved route, whether you drew it yourself or found it on MapPlanner. Scroll down to the 3D fly-over block and press the button of the same name: the page scrolls back up to the map and the flight begins.
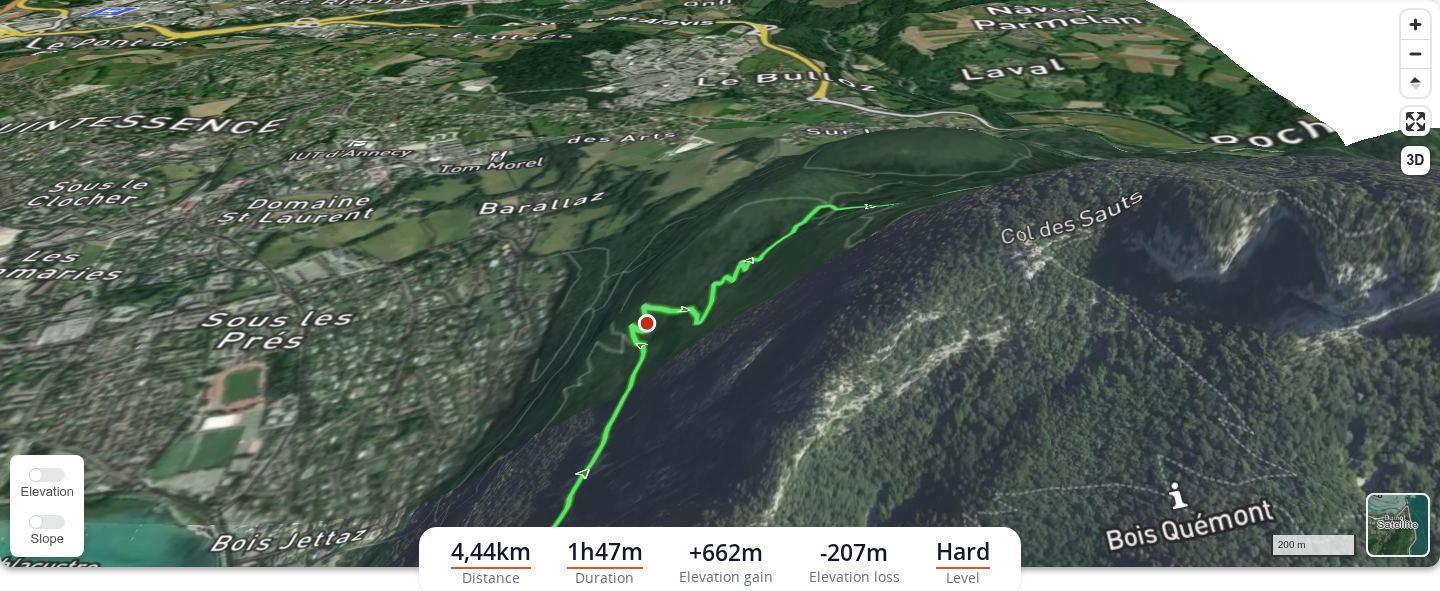
The camera moves in the direction of travel while a marker shows how far along you are. The whole journey takes less than a minute. Stop it whenever you like and replay it as often as you want, for instance to take another look at the descent that worries you.
Plan your own route
MapPlanner helps you calculate distances, elevation, duration and plan your hikes, runs and bike rides on an interactive map.
- Automatic distance & elevation calculation
- Topographic, satellite maps
- GPX/KML export for your GPS
- Real-time GPS tracking
Relief on satellite view or the MapPlanner map
The terrain rises in 3D on the MapPlanner map and on satellite view. Satellite gives the most lifelike result, with forests, scree and high pastures exactly as they are. Choose one of these two base maps before you take off.
What the fly-over tells you about your day
The elevation profile tells you how much you will climb; the fly-over shows you where. On a hike, you spot the steep pull straight after lunch, the exposed ridge or the pass to cross. Suddenly you understand where all that elevation gain comes from.
Trail runners replay a race course to learn its hard sections and decide where to hold back. Cyclists see how the climbs link up and where the road really starts to rise. And for a family walk, a fly-over beats any speech: the kids will want to reach the lake they just saw from the air.
Send the fly-over to your group
Next to the play button, Share the 3D fly-over opens the route's sharing options. Anyone who opens the link sees the fly-over start on its own, with nothing to install, set up or sign up for. It is the best way to introduce the outing to your group before you meet. Sharing only takes a free account; everything about links is covered in our guide to sharing a route.
Our tips for a fly-over that pays off
- Switch to satellite view before you start: that is where the relief looks most striking.
- Finalize the route before sharing the link, since the fly-over follows the route as it is saved.
- On a phone, hold the screen sideways to take in more of the map.
- After the flight, read the elevation profile again: every bump in the curve now has a landscape attached to it.
The 3D fly-over comes with the Explorer plan
The 3D fly-over is part of the Explorer plan, which lets you play it as often as you like. Without a subscription, the button introduces the plan. Drawing, saving and sharing your route stay free. People who receive your fly-over link watch it without paying anything.
Big day tomorrow? Draw your route in the planner, save it and treat yourself to a first run from the air.
Questions about the 3D fly-over
Is the 3D fly-over free?
The 3D fly-over is part of the Explorer plan, with unlimited fly-overs. A free account is enough to share a route's fly-over link; watching one costs nothing.
Does the 3D fly-over work on a smartphone?
Yes. It starts from the route page in your phone's browser, just as on a computer.
Which maps show the fly-over in relief?
The MapPlanner map and satellite view. Select one of them, then start the fly-over.
Do I need to save the route to fly over it?
Yes, the fly-over starts from a route page. Save your route from the planner with a free account, then open its page.


